Saturday, 21 May 2016

So PalmOS is really dead now?

I've been enjoying me PalmOS devices for quite some time now. First as an organizer and multimedia device and later as part of my collection of obsolete technology. What I really liked about PalmOS was it's speed and 'simplicity' if I may call it that. Of course I'm looking at an of from the past, knowing that there are a lot of OSes for portable devices that have a lot of features that PalmOS never had.

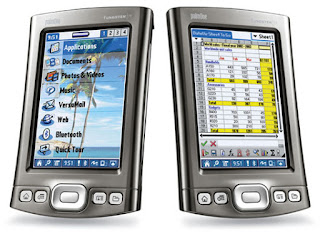
In the past years I've had a Sony Clie PEG-N760C and a PEG-NR70V. Later I upgraded to the Tungsten T2, then the T3 and finally the LifeDrive (which I've upgraded to an 8GB CompactFlash card). Of all those devices, only the T3 and the LifeDrive are still with me (and in working order :D). Recently I acquired a Palm Tungsten T|X, which was one of the last devices that Palm made before switching over to WebOS on the Pre series of smartphones. I was surprised to find that this device actually has received a patch/update to support WPA2 and WPA Enterprise! That is friggin AWESOME! While the Tungsten T|X only has Wireless B built in (802.11b = 11mbps) it works, and the device probably wouldn't be able to handle much more throughput anyway. Because the digitiser was broken, I ordered a new one from eBay, and it was pretty easy to replace it. It seemed like I had a high-end PalmOS device with WiFi, Bluetooth and a "high res" screen.

This is how I got started on wanting to revive PalmOS, at least from a developers perspective. I wanted to write (or port) a JSON library and use it to interact with REST API's or something. Or a remote control for my home automation system. Or basically anything that I could code that did not exist yet for PalmOS. But I hit a few roadblocks.

Lack of documentation and community

There isn't a lot of 'publicly available' documentation on PalmOS development. While the SDK docs can be found in some of the deep dark corners of the web, and a development environment can be set up, there is just no active community at all. It seems like development has stopped for about 10 years (or more!) and all what is left is these obsolete devices that are not able to use most of their functionality. Considering the fact that the devices aren't sold anymore, there is no market for software development on PalmOS and you're not actually gaining anything other than personal satisfaction (most people have forgotten that PalmOS existed at all!) this seems reasonable.

SSL Certificate support is limited to SHA1

While some tools exist to convert CA root certificates to PDB files, the PalmOS does not support SHA256 certificates. This means that most of the HTTPS interwebs is not reachable from the browsers, and secure communication is basically impossible. Most companies that have a WPA2 Enterprise-secured WiFi-network use an SHA256 certificate and this makes using the Tungsten T|X on a corporate network (or country-wide WiFi-hotspot network like the Dutch Ziggo WiFiSpots) impossible. SHA256 has been used in at least one application that I know of, pssh2. Unfortunately re-using this code in an application and rewriting part of PalmOS are two different things.

So what can we still do with our legacy devices?

When these devices were still awesome, a lot of cool stuff has been made. And because the internet was not as big as it is today, most of these apps work offline! Over the next few weeks I'm going to show a few applications that I've used in the past decade and might be nice for you to re-live the PalmOS days again :).

Felix from the 2022 here:

The PalmDB community strives to host files for abandoned projects as well as ROMs for devices and other useful tools. Check it out here. They have a Discord as well! Also Dmitry Grinberg is hacking Palm OS like there is no tomorrow, and there is a guide on how you can get started with a toolchain for PalmOS development here. Of course there is a subreddit as well: /r/Palm. Have fun!

Sunday, 1 May 2016

Unbricking the HM-10 BLE module on the OpenPi

I've been doing some home automation testing using the OpenPi because of it's small footprint, internal RTC and the cute case that was created for it. As a cherry on top, they also included an SRF/XRF module and a Bluetooth LE (HM-10) module so you can remotely open a shell using a Bluetooth-enabled device and an app.

My goal was to scan for devices in the neighborhood and determine whether me or my girlfriend is home so we can turn down the central heating. Using the information found in a document explaining the available AT commands I got no response to the scanning command. I decided to update the firmware of the HC-10. I can now safely say that I have confirmed the module in the OpenPI to be the TI CC2541. In the flashing manual the following message can be found:

Note: this operation is not reversible, please be sure to note, after the operation is completed, if you don't want to upgrade, the module will not return not normal working mode.

I assumed that no firmware manufacturer could ever actually write firmware that could leave the device in a bricked state unless you provide firmware. What if the device isn't actually connected to a windows pc? Well, after issuing the software upgrade command that was exactly the situation I was in.

To save you the trouble, the tool that Huamao Technology provides does not work correctly using the workaround I did to flash the HM-10 on my OpenPi. Luckily the tool provided by the manufacturer of the bluetooth chip DOES work! So download the firmware from Huamao's site (HM-10, CC2541) and follow the next few steps to bring your HM-10 back from the dead.


Requirements:


  • A Windows (virtual) machine to run the update tool on
  • Raspbian or similar image on your OpenPi, SSH enabled
  • A network connection between your Windows PC and OpenPi
  • socat and minicom installed on your OpenPi (sudo apt-get install socat minicom -y)


Step 0: (if you did not brick the HM-10 yet but are feeling adventurous) set the HM-10 module to Software Upgrade mode:

ssh into your raspberry pi.

Run: minicom -s

A menu opens. You want to select "Serial Port Setup", Press 'A', replace ttyUSB0 with ttyS0 (assuming this is the device that your HM-10 is connected to), press Enter.

Setting E should be set to 9600 8N1. If this is not the case, press E, then C, then Enter.
If your screen looks somewhat like the screenshot above, press Enter. You should now see the minicom menu. Select Exit to open the session. You will not see what you're typing. If you prefer seeing what you type, press Ctrl + A, then Z, then E. This turns on the "Echo".

Then paste the following command to place the module into Software Upgrade mode:


AT+SBLUP 

After this your device will be in Upgrade mode. You can exit minicom by pressing Ctrl + A, Q and answering 'Yes'.

From this point on, the HC-10 module switches to 115200 baud for the software upgrade.


Step 1: Start Socat on the Raspberry Pi

To provide raw TCP access to the bluetooth modules serial interface, run the following command:

while true; do
  socat tcp-listen:54321,reuseaddr /dev/ttyS0,b115200,raw,echo=0
done

This command makes socat listen on port 54321, and if the server is stopped by a reset command, a new server is started.


Step 2: Install Eltima Serial to Ethernet connector (trial) on your Windows machine

Download the trial, install it and open the program that is installed on your machine.


Step 3: Create a connection to your socat instance on the pi:

This is what the setting should look like.
Replace the hostname with the IP of
your OpenPI.
- Choose 'create a client connection'
- Select an unused COM-port number (I chose COM3)
- Fill in the remote hostname (IP address of your OpenPI)
- Fill in the port number (54321, the socat listening port)
- Open 'Advanced Settings'
- Disable 'Connect to Remote end only when local virtual port is open' checkbox
- Enable 'On error retry to establish connection every' checkbox, and set its value to 100ms.
- Press 'Apply Changes'


Step 4: Install and open the TI SerialBootTool.


Step 5: Select the firmware file and serial port. 

After selecting the serial port, press the 'Open' button.


Step 6: Flash away! 

After flashing and verification (which may take a while, approx. 5 minutes?) you should be good to go!

This should be the result of your hard work!
Of course, because of the while loop, we started on the Pi it is probably best to close the session where the loop is run. This will also kill the loop. Otherwise, just restart the pi by unplugging the MicroUSB plug providing power to the device.

Other helpful and somewhat related HM-10 resources:

http://smoothieware.org/bluetooth-serial
https://github.com/WirelessThings/OpenPi/blob/master/gettingstarted.rst
http://openmicros.org/index.php/component/kunena/14-openpi/11317-bluetooth-module?Itemid=0
https://github.com/RedBearLab/CCLoader/blob/master/Arduino/CCLoader/CCLoader.ino
http://raspberrypi.stackexchange.com/questions/15382/raspberry-pi-used-as-a-cheap-serial-to-wlan-converter